How to Safely Repair a Torn Weighted Blanket: Step‑by‑Step Guide to Fix Rips and Protect the Filling
Introduction
Weighted blankets provide therapeutic pressure, yet a tear can compromise both comfort and safety. This guide explains how to assess damage, select appropriate tools, and execute a repair that restores structural integrity. Readers will learn how to protect the internal glass or plastic beads while achieving a seamless finish. By following the outlined steps, one can extend the life of a weighted blanket without professional assistance.
What You’ll Need
- Gemoioio Heavy Duty Sewing Kit – includes waxed thread, stainless‑steel needles, and a storage bag.
- Topus Upholstery Sewing Kit – provides additional curved needles and nylon thread for heavy fabrics.
- Sharp fabric scissors or rotary cutter.
- Fine‑tooth seam ripper (optional for removing damaged stitches).
- Flat surface with good lighting.
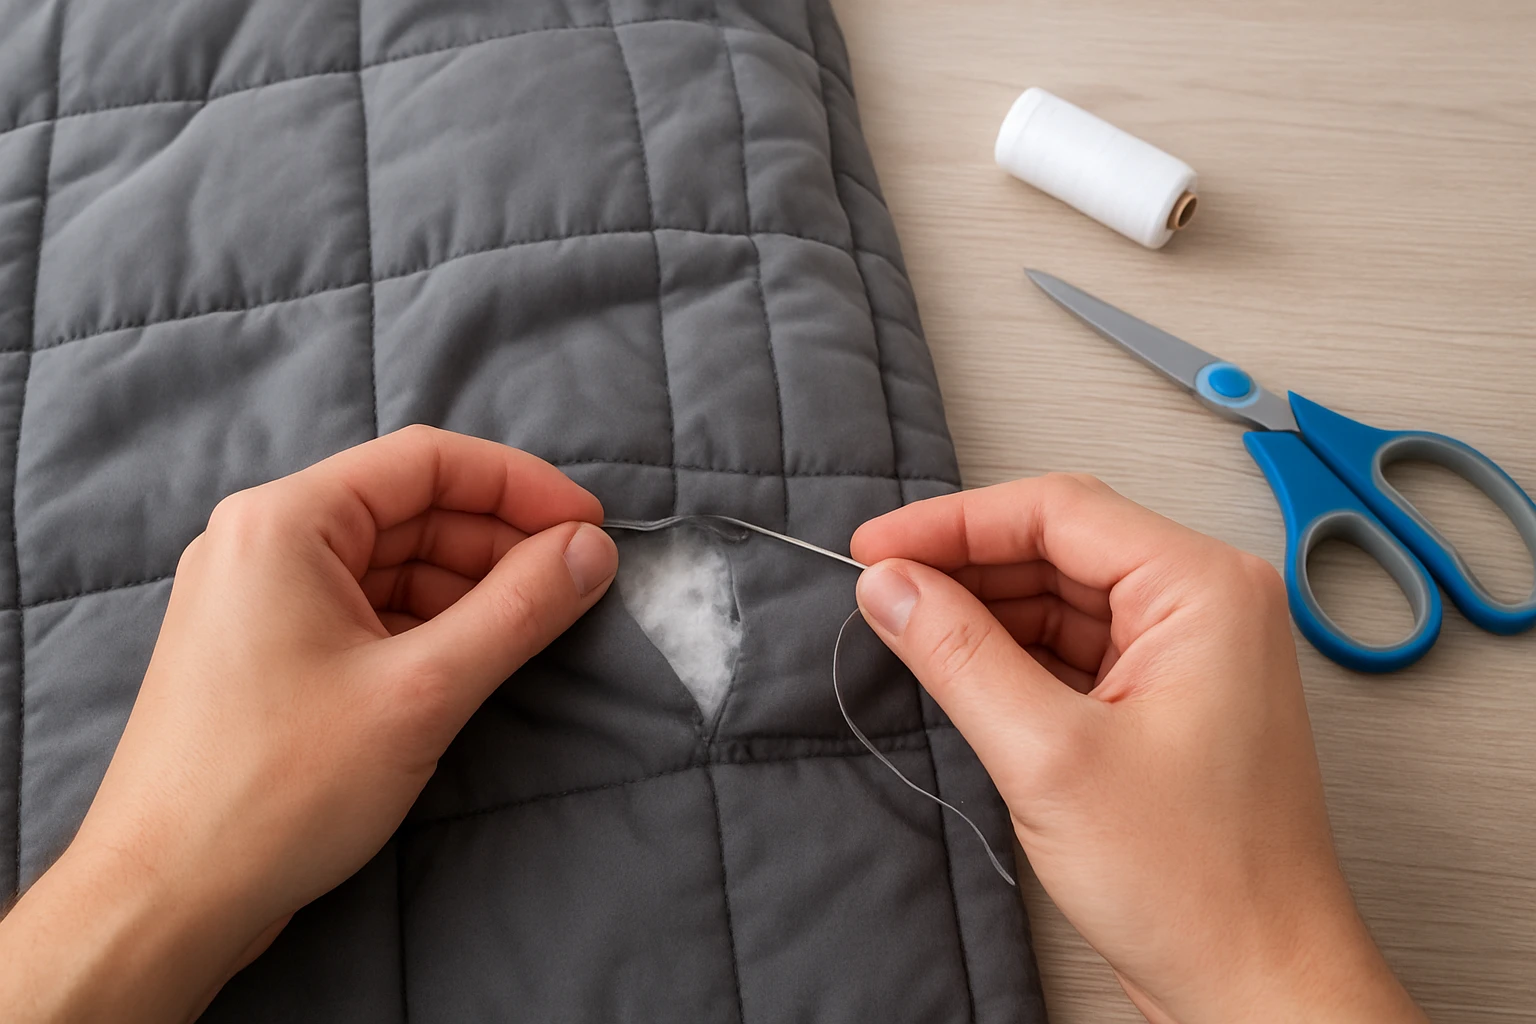
Step 1: Inspect the Blanket Thoroughly
Begin by laying the blanket on a clean, flat surface and examining the tear from multiple angles. Identify whether the rip follows a straight line or a jagged pattern, and note any frayed edges that could catch on the stitching. Use a magnifying glass if the seam is narrow, because hidden splits often lead to future failures. Document the dimensions of the opening; a measurement guide will assist in selecting the appropriate thread length and needle size.
Step 2: Gather the Appropriate Tools
Having the right tools simplifies the repair and reduces the risk of damaging the bead filling. The Gemoioio Heavy Duty Sewing Kit offers stainless‑steel needles that resist bending when penetrating dense fabric, and waxed thread that slides smoothly without catching on the bead pockets. Its compact storage bag keeps all components organized, preventing loss during the procedure. For extra needle variety, the Topus Upholstery Sewing Kit supplies curved needles ideal for reaching around the weighted layers without pulling them out.
Step 3: Trim Frayed Edges and Prepare the Fabric
Using sharp fabric scissors, cut away any loose threads that extend beyond the tear. Create a clean, straight edge by trimming approximately 2‑3 mm from each side; this prevents the seam from unraveling later. If the fabric is thick, a rotary cutter can produce a more precise cut. After trimming, press the area lightly with a cool iron to flatten the fibers, being careful not to melt synthetic fillings. This preparation step ensures that the subsequent stitches will lie flat and distribute pressure evenly.
Step 4: Stitch the Rip with a Reinforced Seam
Select a heavy‑duty needle from the Gemoioio kit—preferably a size 14 or 16 stainless‑steel needle for dense upholstery material. Thread the needle with one of the waxed threads (black or dark brown) to match the blanket’s color, pulling enough length to complete the seam without re‑threading. Begin stitching a few centimeters before the tear, using a backstitch pattern that creates a strong, interlocking seam. The back‑stitch distributes tension across the fabric, reducing the likelihood of the seam opening under the blanket’s weight. After reaching the end of the tear, continue stitching an additional few centimeters to secure the finish.
Step 5: Reinforce the Seam with a Double Stitch or Bar Tack
For added durability, apply a second line of stitching parallel to the first, offset by 2‑3 mm. This double‑stitch technique creates a barrier that resists shear forces generated by the weighted beads. If the tear is located in a high‑stress area, such as a corner, consider adding a bar tack—a series of tightly spaced stitches—using the curved needles from the Topus kit. The bar tack provides a reinforced anchor point, preventing the seam from pulling apart during regular use.
Step 6: Test the Repair and Restore the Blanket
Once stitching is complete, gently tug on the repaired section to confirm that the seam holds firm. Lay the blanket flat and distribute the beads evenly, then place a moderate weight on the repaired area for several minutes. Observe whether the seam stretches or shows signs of strain; if it does, repeat the reinforcement step with additional stitches. Finally, fold the blanket as usual and store it in a dry environment to allow the waxed thread to settle and the fabric to retain its shape.
Tips & Pro Tips
- Work in a well‑lit area to avoid missing small frays that could later expand.
- Choose thread colors that blend with the blanket to maintain aesthetic appeal.
- When using the Topus curved needles, insert them at a shallow angle to glide around the bead pockets without dislodging them.
- Apply a light fabric glue along the seam after stitching for an extra waterproof seal, but test on an inconspicuous area first.
- Store the repair kits in a zip‑lock bag to protect needles from rust and thread from moisture.
Troubleshooting
Problem: Needle bends or breaks during stitching.
Solution: Switch to a larger stainless‑steel needle from the Gemoioio kit; ensure the fabric is not overly stretched before inserting the needle.
Problem: Thread slips or knots while stitching.
Solution: Use the waxed thread’s lubricating properties; if necessary, re‑wax the thread by lightly rubbing it with a small amount of paraffin.
Problem: Seam opens after a few washes.
Solution: Reinforce with a double stitch and consider adding a bar tack in the most stressed region.
Conclusion
Repairing a torn weighted blanket requires careful inspection, proper tool selection, and precise stitching techniques. By following the steps outlined above, one can restore the blanket’s structural integrity, protect the bead filling, and extend its usable life. The recommended Gemoioio and Topus sewing kits provide the durability and versatility needed for heavy‑fabric repairs, while the additional tips help avoid common pitfalls. With patience and the right equipment, anyone can achieve a professional‑grade repair that maintains both comfort and safety.
Products Mentioned in This Guide
Frequently Asked Questions
What tools are essential for repairing a torn weighted blanket?
A heavy‑duty sewing kit with waxed thread, stainless‑steel needles, sharp fabric scissors, and a fine‑tooth seam ripper are essential.
Can I fix a tear without damaging the internal beads?
Yes—use a gentle stitch pattern and avoid pulling the fabric too tight to keep glass or plastic beads contained.
How do I prepare the damaged area before sewing?
Trim any loose threads, clean the edges, and optionally use a seam ripper to remove broken stitches for a clean surface.
What stitching method provides the strongest repair?
A reinforced double‑stitch or backstitch with waxed thread offers durable strength for heavy fabrics.
Is it safe to wash a repaired weighted blanket?
After the repair has fully set, you can machine‑wash on a gentle cycle, but use a duvet cover to protect the seam.