Introduction
This guide explains how one can replace the outer cover of a weighted blanket with a fabric that addresses sensory sensitivities. Readers will learn how to measure, select appropriate materials, and construct a new cover that maintains the therapeutic benefits of the blanket. The process emphasizes safety, durability, and comfort, allowing individuals to customize their sleep environment. By following each step, one can create a sensory‑friendly solution without compromising the blanket’s weight distribution.
What You’ll Need
- A Cottonblue Weighted Blanket (15 lb, queen size) – Price: $79.99, Rating: 4.7/5.0 (5,981 reviews)
- Sensory‑friendly fabric such as bamboo, organic cotton, or soft fleece
- Fabric scissors with sharp blades
- Measuring tape or ruler
- Sewing machine or hand‑sewing needle
- Thread that matches the chosen fabric
- Fabric pins or clips
- Optional: Zipper or Velcro closure
Step 1: Measure the Existing Blanket
Begin by laying the weighted blanket on a flat surface. Use a measuring tape to record the length and width of the blanket, noting any irregularities caused by seams or stitching. For a queen‑size blanket, the dimensions are typically 60 inches by 80 inches. Write the measurements down to ensure the new cover will fit snugly without excess fabric that could shift during use. Accurate measurements prevent wasted material and guarantee a professional finish.
Step 2: Select a Sensory‑Friendly Fabric
Choose a fabric that offers a tactile experience suited to the user’s sensory profile. Bamboo fabric provides a cool, silky feel, while organic cotton offers breathability and hypoallergenic properties. Soft fleece delivers warmth without overstimulation. Consider the fabric’s weight; a medium‑weight material (approximately 180–200 gsm) balances durability with comfort. The chosen fabric should be machine washable to maintain hygiene, especially for individuals with heightened sensory awareness.
Step 3: Cut the New Fabric to Size
Lay the selected fabric on a clean cutting surface and mark the dimensions using fabric chalk. Add an extra 2 inches to each side to accommodate seam allowances. Using sharp fabric scissors, cut the fabric along the marked lines, ensuring straight edges. Cutting with precision reduces the need for later adjustments and results in a cleaner seam. If the fabric pattern is directional, align the pattern so that the front of the cover presents a cohesive appearance.
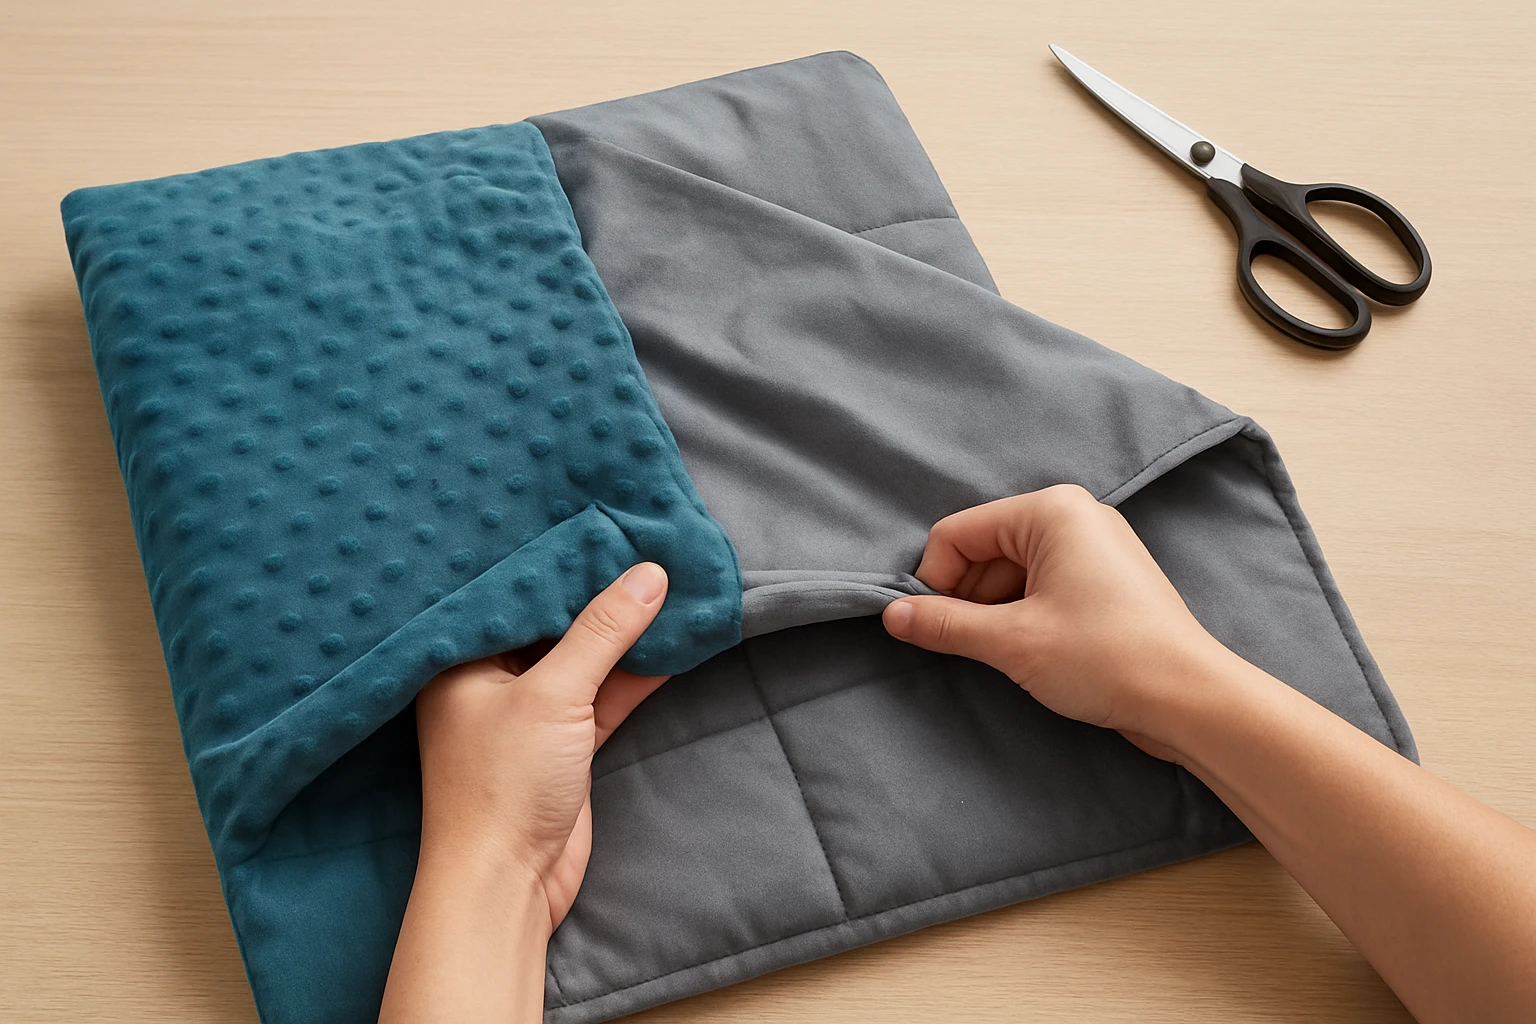
Step 4: Create a Pocket for the Weighted Blanket
Fold the cut fabric in half, right sides together, aligning the shorter edges. Pin the edges to hold the fabric in place. Sew a straight seam along the folded edge, leaving one of the longer sides open to form a pocket. This pocket will house the weighted blanket while allowing easy removal for washing. Reinforce the seam with a double stitch to prevent stress from the blanket’s weight. The pocket design mirrors the construction of the original cover, preserving the blanket’s therapeutic pressure.
Step 5: Sew the Cover Together
Turn the pocket right side out and lay it flat. Align the open edges of the pocket with the opposite open edges of the fabric, creating a rectangular envelope. Pin these edges securely. Using a sewing machine set to a medium stitch length, sew the remaining three sides, ensuring the seam is even and strong. For hand‑sewing, employ a backstitch for added durability. Press the seams with an iron on a low setting to flatten the stitching and improve the overall appearance.
Step 6: Finish Edges and Add Closure (Optional)
If a closure is desired, attach a zipper or Velcro strip along the final open edge. Measure the edge, cut the closure to length, and sew it in place using a zipper foot or a straight stitch. A closure simplifies removal of the blanket for cleaning and provides a secure fit during sleep. If a closure is not required, finish the raw edge with a serged stitch or a bias tape to prevent fraying. The finished cover should feel smooth to the touch, avoiding any rough seams that could trigger sensory discomfort.
Tips & Pro Tips
- Test a small fabric swatch against the user’s skin before cutting the full piece to confirm the tactile suitability.
- Use polyester‑free thread to reduce the risk of irritation for highly sensitive individuals.
- Pre‑wash the fabric to eliminate any residual chemicals and to shrink the material before sewing.
- Consider adding a thin layer of breathable mesh between the blanket and the cover to enhance airflow.
- Label the cover with a washable tag indicating wash instructions and fabric type.
Troubleshooting
- Cover is too loose: Re‑measure the blanket and trim excess fabric from the seams, then resew the pocket.
- Stitch puckering: Adjust the tension on the sewing machine and use a new needle appropriate for the fabric weight.
- Fabric fraying: Apply a fabric sealant or finish the edges with bias tape to prevent further wear.
Conclusion
By following this step‑by‑step guide, one can create a custom cover that addresses sensory challenges while preserving the therapeutic weight of the blanket. The process combines accurate measurement, thoughtful fabric selection, and careful sewing techniques to produce a durable, sensory‑friendly solution. Readers are encouraged to experiment with different fabrics to discover the most soothing texture for their individual needs.
Products Mentioned in This Guide
Frequently Asked Questions
How do I measure my weighted blanket to create a new cover?
Lay the blanket flat, measure its length and width with a tape measure, and add 1‑2 inches for seam allowances.
What fabrics are best for sensory‑friendly blanket covers?
Bamboo, organic cotton, and soft fleece are ideal because they are breathable, hypoallergenic, and gentle on the skin.
Can I use a zipper or Velcro for the cover closure?
Yes, a hidden zipper or Velcro strips provide easy removal while keeping the blanket securely enclosed.
Will swapping the cover affect the blanket’s weight distribution?
No, as long as the new fabric is lightweight and the seams are evenly sewn, the weight distribution remains unchanged.
Do I need special tools to sew a weighted blanket cover?
A sharp fabric scissors, a sewing machine or hand‑sewing needle, matching thread, and pins or clips are sufficient.